
This CTF is part of the SOC Level 1 learning path on TryHackMe. It simulates active network breaches on a system, and you are tasked with detecting and remediating the breaches with Snort.
Snort is an Intrusion Prevention System (IPS) that can detect and block malicious network traffic that matches the rules you give Snort to use. In this room, we’ll be using it to first sniff out the bad traffic in a live system, then we’ll create custom rules for Snort to block the bad actors.
You can find the link to Snort Challenge - Live Attacks here.
Scenario 1 | Brute Force#
Stop the attack and get the flag (which will appear on your Desktop)#
First, let’s detect incoming traffic with Snort in packet logger mode, and let it run for a few seconds:
sudo snort -X -l .
Analyze the generated log file (should be in the same directory), and you might already find some trends:
sudo snort -r snort.log.1716222926 -X
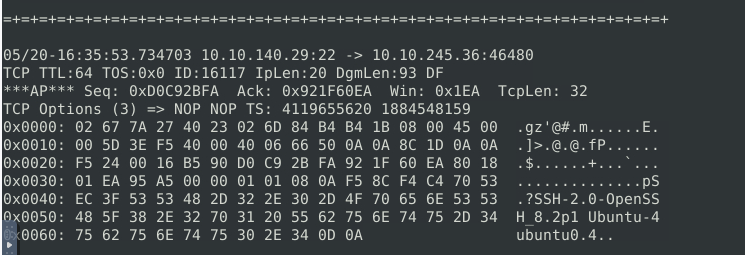
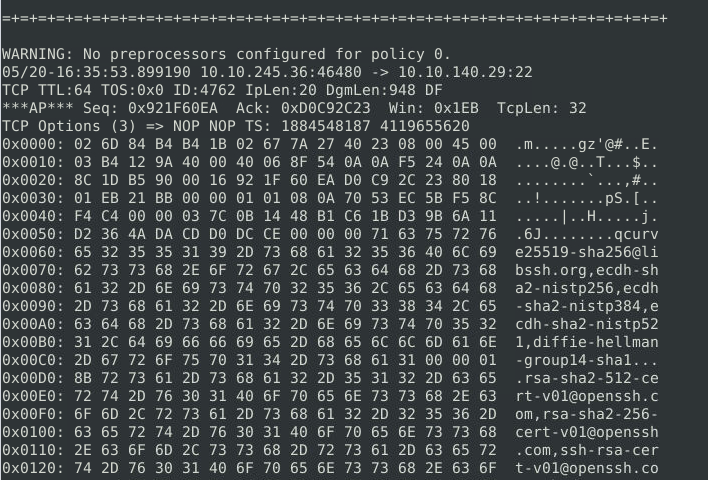
Looking at the plaintext data, it seems there’s a lot of traffic to the SSH service (port 22) from a single IP address (10.10.245.36). It’s likely someone attempting many SSH connection attempts.
Since all the SSH traffic is coming from one IP, we can create a Snort rule that rejects all packets sent by that IP:
1reject tcp 10.10.245.36 any -> any any (msg: 'block malicious ip'; sid: 1000001; rev: 1;)
Test the rule to make sure only those packets would be rejected:
sudo snort -c local.rules -A console -l .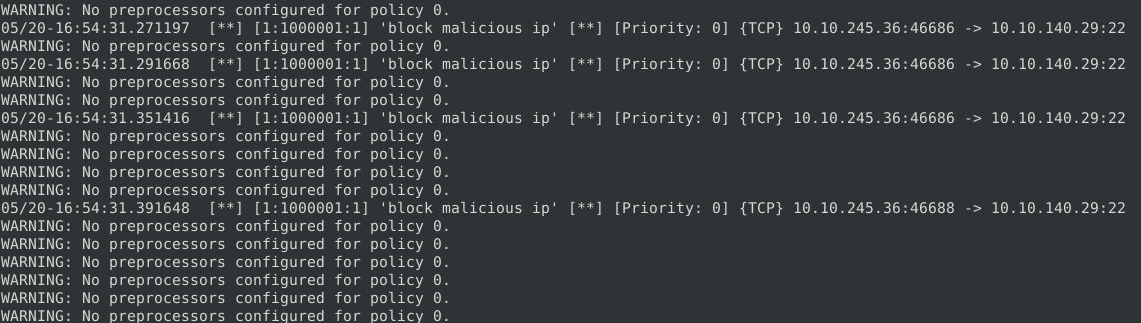
Successfully blocking malicious traffic.
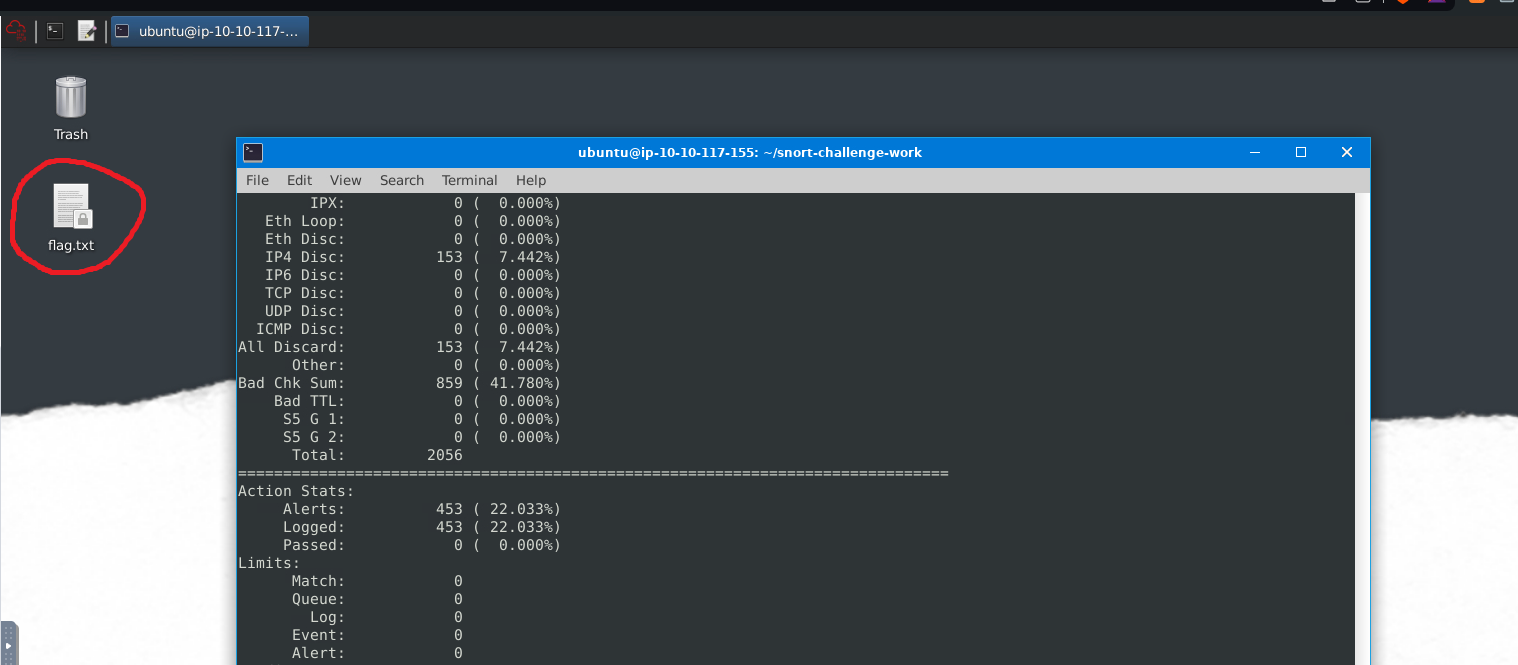
Great! Since the tests runs as expected, we can run Snort in IPS mode to successfully block the attack, and the flag will appear on the desktop within a minute:
sudo snort -c local.rules -A full -l /var/log/snort/
What is the name of the service under attack?#
This should be answered during our investigation in the previous question.
What is the used protocol/port in the attack?#
This should be answered during our investigation in question 1.
Scenario 2 | Reverse-Shell#
Stop the attack and get the flag (which will appear on your Desktop)#
Again, let’s detect incoming traffic with Snort in packet logger mode, then analyze the generated log file:
sudo snort -X -l .sudo snort -r snort.log.1716225219 -X
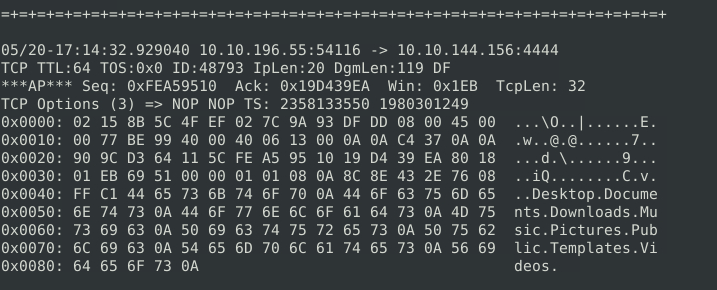
Directory information being sent over the network?
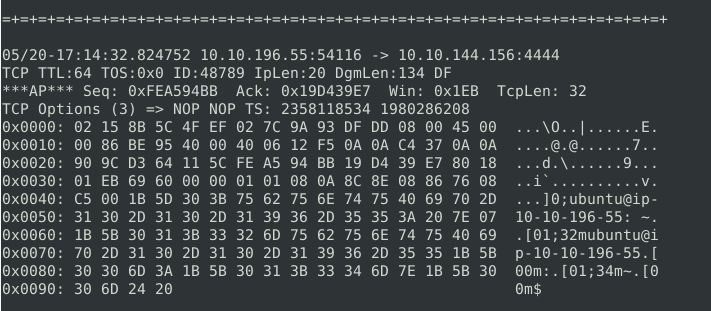
Command prompt information being sent over the network?
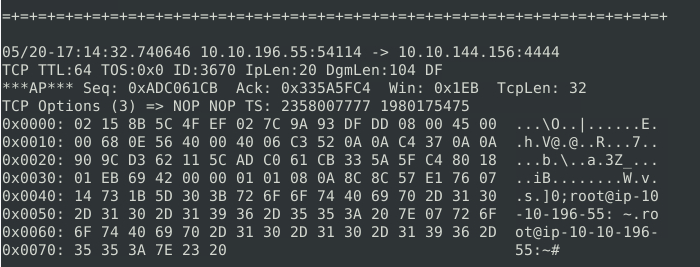
Root command prompt information being sent over the network?
As noted in the images above, this type of information being broadcast over the network is odd, and all of this is going to the same IP through TCP on port 4444.
- This is a default port for a commonly-used exploitation tool, so if you’ve also picked up on that, then we can be fairly confident that this is a network breach. The attacker has set up a reverse-shell, and is communicating with an external command and control server.
We have the IP of the C2 server, so we can create a Snort rule to reject packets being sent to and from this IP address:
1reject tcp 10.10.144.156 any <> any any (msg: "reject c2 ip"; sid: 1000001; rev: 1;)
Test the rule, and it should work:
sudo snort -c local.rules -A console -l .
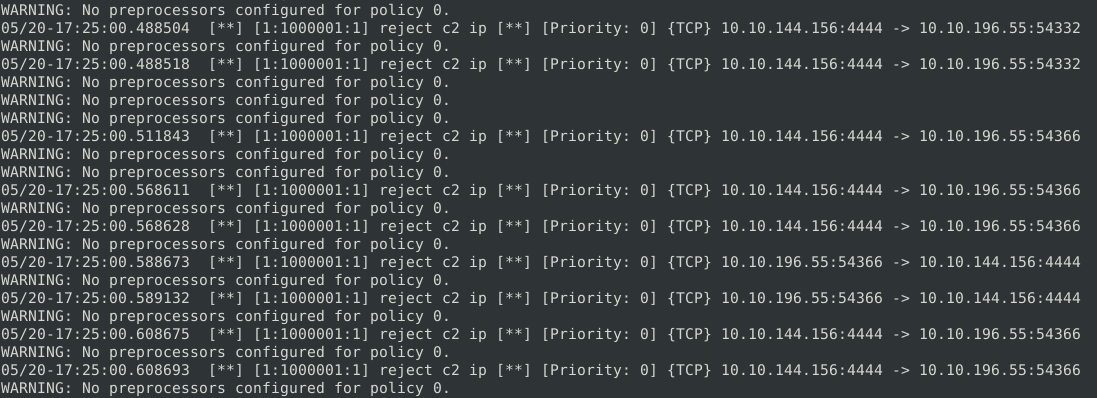
Successfully blocking malicious traffic.
Run Snort in IPS mode with this new rule, and you’ll have the second flag.
What is the used protocol/port in the attack?#
This should be answered during our investigation in the previous question.
Which tool is highly associated with this specific port number?#
If you aren’t aware of this tool already, a quick Google search of exploit tools using port 4444 should yield the answer.
Conclusion#
And that’s it! It’s a short and sweet room that can introduce learners to finding and fixing security breaches in real-time, in a low-pressure setting.